Run “LocoAnalyse” from the program menu or the desktop icon, if you have one.
Select “Configure | Configure Boards” from the menu.
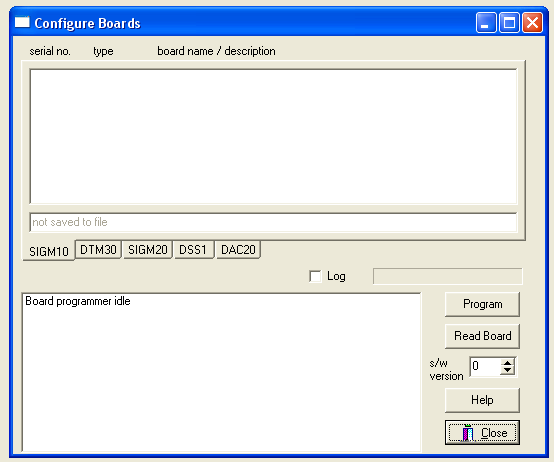
This window is the focus for all programming actions for configurable boards. From here you can enter the settings for each board type, save them to files, and program them to the boards over a live LocoNet connection.
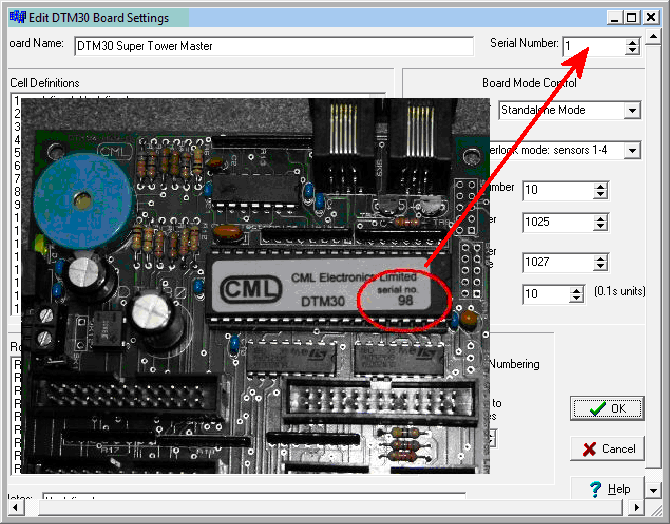
Select the DTM30 tab on the board list. The select “Boards | Add new board” from the menu.

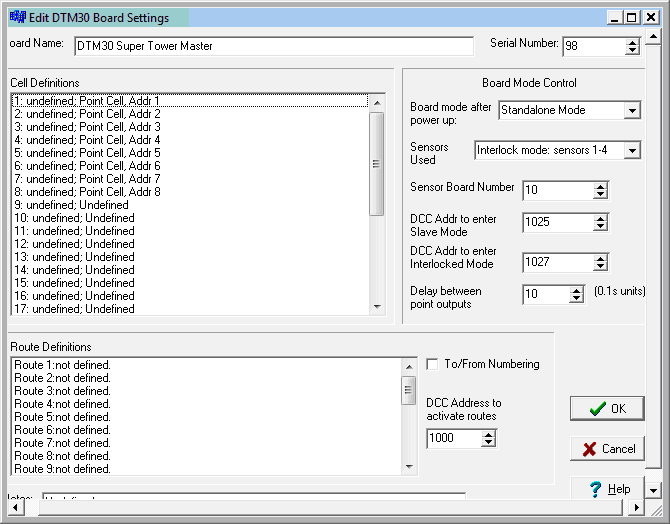
Double click on the newly listed board (the one that says “not yet set” for its serial number) to open the DTM30 board editor window. Enter the new serial number 98 (top right) then press “OK”
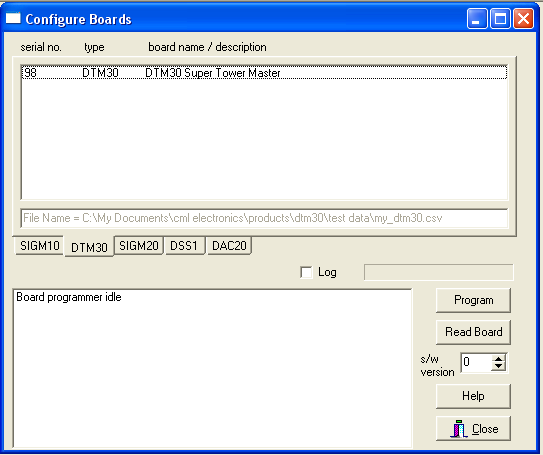
Your board is now displayed in the list. Select “File | Save As…” from the menu, and choose a folder and filename to store your settings. This file will store all of the DTM30 board settings you have.
Programming settings for Your Railway
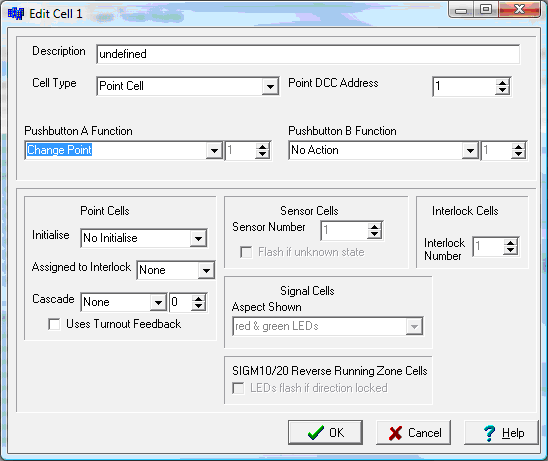
Now your data has a place to live, and it’s time to entre the settings to control points 1-8. We will program cells 1-8 to hold these; the pushbutton A for each cell will be selected as “toggle point” so that every time the pushbutton is pressed, the point will be changed.
Double click the board entry in the list of DTM30s; then double click the row for cell 1 in the cell definitions. You are now editing cell 1. Select “cell type” to be “point cell”. The DCC address box needs to be set to the accessory address for this point (in this case cell 1 = address 1, so leave it alone). Select pushbutton A function to be “change point”
That’s it for that cell – press “OK”. Do the same for cells 2-8, but making their DCC addresses 2-8. The list of cells will now look like this:
Click “OK”. Then select “File | Save” from the menu, to save these settings to the file. (You always do that, I know).
Programming the Board
To program the settings into the board:
- Select the row for the board in the list of DTM30 boards
- Press the “program” button. The programming process will begin, and the progress bar will light up blue as it proceeds. Programming should take around 10 seconds.
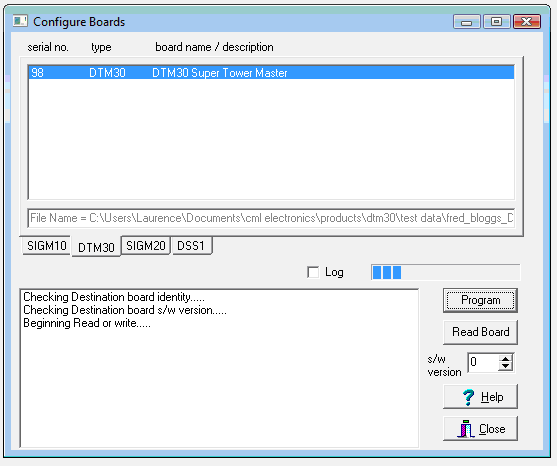
That’s it: your board is now ready to be used.